January 1, 2024
Article 5 - Tokenization: The Gateway to Transformer Understanding
Article 5 - Tokenization: The Gateway to Transformer Understanding
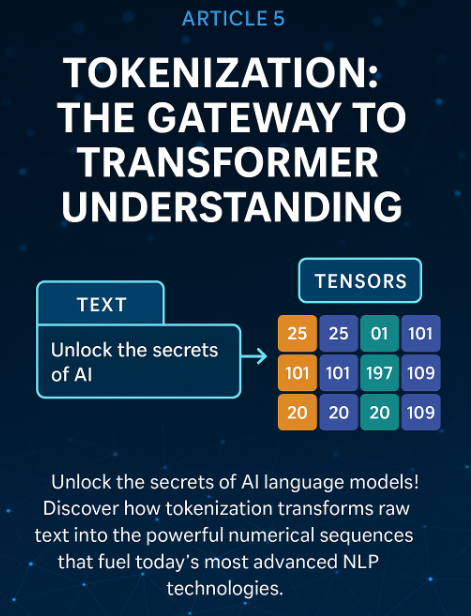
Every journey into transformer models begins with a critical step: converting human language into a format machines can understand. Tokenization serves as this essential bridge, transforming raw text into structured numerical sequences that power today’s most advanced AI language models.
In this article, we will demystify tokenization, revealing its central role in NLP pipelines and showing why it matters for real-world applications. Whether you are building chatbots, analyzing documents, or training custom models, mastering tokenization unlocks the full potential of transformer architecture.
You will learn:
- How tokenization transforms text into tokens and numerical IDs
- The strengths and weaknesses of major tokenization algorithms (BPE, WordPiece, Unigram)
- Practical implementation using Hugging Face’s modern tokenization tools
- Techniques for multilingual and domain-specific tokenization
- How to customize tokenizers for specialized vocabularies
- Debugging strategies to ensure reliable tokenization
- Recent developments in token efficiency and multimodal approaches
By the end of this chapter, you will understand not just how tokenization works, but why it forms the foundation of every transformer model’s ability to process language. Let us begin by exploring what happens when text meets tensors.
Tokenization: Bridging Text and Tensors
mindmap
  root((Tokenization))
    Core Concepts
      Text to Tokens
      Tokens to IDs
      Special Tokens
      Vocab Mapping
    Algorithms
      BPE (Byte Pair)
      WordPiece
      Unigram
      SentencePiece
    Practical Tools
      AutoTokenizer
      Fast Tokenizers
      Custom Training
      Batch Processing
    Advanced Topics
      Multimodal
      Alignment Maps
      Token Reduction
      Debugging
    Business Impact
      Multilingual
      Domain-Specific
      Performance
      Error Prevention

```**Step-by-Step Explanation:**- Root node focuses on**Tokenization**- Branch covers **Core Concepts** including text splitting, ID mapping, special tokens, and vocabularies
- Branch explores **Algorithms** like BPE, WordPiece, Unigram, and SentencePiece
- Branch details **Practical Tools** with AutoTokenizer, fast implementations, and batch processing
- Branch highlights **Advanced Topics** including multimodal, alignment, and debugging
- Branch shows **Business Impact** on multilingual support, domains, and performance


# Introduction: Cracking the Language Code


## Environment Setup

Before diving into tokenization, let us ensure you have the right environment:


### Poetry Setup (Recommended for Projects)

```bash

# Install poetry if not already installed
curl -sSL <https://install.python-poetry.org> | python3 -


# Create new project
poetry new tokenization-project
cd tokenization-project


# Add dependencies
poetry add transformers==4.53.0 tokenizers datasets torch
poetry add --group dev jupyter ipykernel


# Activate environment
poetry shell
Mini-conda Setup (Alternative)
# Download and install mini-conda from <https://docs.conda.io/en/latest/miniconda.html>


# Create environment with Python 3.12.9
conda create -n tokenization python=3.12.9
conda activate tokenization


# Install packages
conda install -c pytorch -c huggingface transformers tokenizers datasets torch
conda install -c conda-forge jupyterlab
Traditional pip with pyenv
# Install pyenv (macOS/Linux)
curl <https://pyenv.run> | bash

# Configure shell (add to ~/.bashrc or ~/.zshrc)
export PATH="$HOME/.pyenv/bin:$PATH"
eval "$(pyenv init -)"


# Install Python 3.12.9 with pyenv
pyenv install 3.12.9
pyenv local 3.12.9


# Create virtual environment
python -m venv venv
source venv/bin/activate  # On Windows: venv\\Scripts\\activate


# Install packages
pip install transformers==4.53.0 tokenizers datasets torch jupyterlab
📏 Common Token Limits:
- BERT: 512 tokens
- GPT-2: 1,024 tokens
- GPT-3/4: 4,096-32,768 tokens
- Claude: 100,000+ tokens Use these limits when setting max_length in tokenizer calls.
Imagine teaching a robot to read a novel. For us, words and sentences carry meaning. For machines, it is a wall of symbols. Tokenization cracks this code: it breaks text into small, understandable pieces—tokens—so models can process language. Think of it as slicing bread: each slice becomes manageable, but the whole loaf overwhelms.
In every transformer-based NLP pipeline, tokenization comes first. Models cannot work with raw text—they crave numbers. These numbers, called tensors, are multi-dimensional arrays that serve as the language of deep learning. Tokenization converts words into these tensors, enabling models to learn from and reason about language.
Why does tokenization matter so much? The way you slice up language affects everything. Consider a global chatbot handling English, Mandarin, emojis, and slang. A medical model must recognize terms like “myocardial infarction” as a unit. The right tokenizer helps models understand users; the wrong one leads to errors or confusion.
| Tokenizer Type | Tokens/sec | Memory Usage |
|---|---|---|
| Fast (Rust) | 50,000+ | Low |
| Python | 5,000 | Medium |
| Custom | Varies | Depends |
Modern Hugging Face workflows leverage highly optimized ‘fast’ tokenizers (powered by the Rust-based tokenizers library) that efficiently handle tokenization and preprocessing. The recommended approach? Use the tokenizer as a callable: tokenizer(text). This method seamlessly handles splitting, mapping to IDs, padding, truncation, and batch processing, ensuring compatibility with current and future transformer models.
Let us witness tokenization in action with Hugging Face. The following example shows how raw text becomes tokens and input IDs your model can use, following current best practices.
Modern Tokenization Example with Hugging Face
from transformers import AutoTokenizer


# Load a pre-trained fast tokenizer (BERT)
tokenizer = AutoTokenizer.from_pretrained('bert-base-uncased')

text = "Transformers are revolutionizing AI!"


# Tokenize and prepare model inputs in one step
encoded = tokenizer(text)
print('Input IDs:', encoded['input_ids'])
print('Tokens:', tokenizer.convert_ids_to_tokens(encoded['input_ids']))


# For direct tensor output (e.g., for PyTorch models):
tensor_inputs = tokenizer(text, return_tensors="pt")
print('Tensor Input IDs:', tensor_inputs['input_ids'])
Step-by-Step Explanation:
- Load the Tokenizer: We use Hugging Face’s
AutoTokenizerto load a pre-trained BERT tokenizer. By default, this loads a highly efficient ‘fast’ tokenizer compatible with modern models. - Tokenize and Encode: Calling
tokenizer(text)splits the sentence into tokens, maps them to unique IDs, and returns everything needed for model input. This unified interface handles punctuation, casing, and special tokens automatically. - Tensor Output: For deep learning frameworks like PyTorch or TensorFlow, use
return_tensors="pt"(or"tf") to get tensors directly—essential for training and inference workflows.
Best Practice: For most transformer models, always use the tokenizer as a callable (tokenizer(text) or tokenizer(list_of_texts)). This ensures correct preprocessing, padding, truncation, and batch handling, and remains robust to future API changes.
Skip or misuse tokenization, and your model gets lost—like a traveler without a map. Poor tokenization can break words, miss important terms, or fail with new languages and symbols. For businesses, this means misinterpreted queries, failed analyses, or compliance risks. A strong tokenization strategy boosts accuracy and opens new possibilities.
Most Hugging Face tokenizers are ‘fast’ by default, leveraging the Rust-based tokenizers library for high performance and efficiency. This proves especially important for large-scale or production applications, where speed and consistency reign supreme.
Modern tokenization workflows also support batching (processing multiple texts at once) and direct tensor outputs for seamless integration with model training and inference. For example, tokenizer(["Hello world!", "Bonjour le monde!"], return_tensors="pt") efficiently processes multilingual input in one call.
Recent advances include context-aware and adaptive tokenization, plus tokenization for multimodal models (text+image, etc.), expanding transformer capabilities. The Hugging Face ecosystem rapidly evolves to support these capabilities.
While traditional NLP libraries like spaCy and NLTK offer tokenization, Hugging Face tokenizers are specifically optimized for transformer models and deep learning workflows. For custom domains, you can efficiently train your own tokenizer (BPE, WordPiece, Unigram, etc.) using the Hugging Face tokenizers library—see Article 11 for advanced customization.Key Takeaways:- Tokenization forms the essential first step for transformer models
- Models need numbers, not words—tokenization bridges this gap
- Use modern, fast tokenizers and the callable API for robust, scalable workflows
- The right strategy impacts accuracy, coverage, and business outcomes
Next, we will dive deeper into tokenization algorithms and see how your choices shape every NLP solution.
Why Tokenization Matters
flowchart TB
  subgraph Input Types
    Text[Raw Text] --> Tokenizer
    Images[Images] --> ImageProcessor[Image Processor]
    Audio[Audio] --> AudioProcessor[Audio Processor]
  end

  subgraph Tokenization Process
    Tokenizer --> Split[Split into Tokens]
    Split --> Map[Map to IDs]
    Map --> Tensors[Convert to Tensors]
    ImageProcessor --> Patches[Image Patches]
    Patches --> Embeddings[Visual Embeddings]
    AudioProcessor --> Features[Audio Features]
    Features --> Embeddings
  end

  subgraph Model Input
    Tensors --> Model[Transformer Model]
    Embeddings --> Model
  end

  classDef default fill:#bbdefb,stroke:#1976d2,stroke-width:1px,color:#333333
  classDef process fill:#c8e6c9,stroke:#43a047,stroke-width:1px,color:#333333
  class Split,Map,Patches,Features process

```**Step-by-Step Explanation:**-**Input Types**shows raw text, images, and audio entering respective processors
-**Tokenization Process**illustrates splitting, mapping, and conversion steps
- Text becomes tokens → IDs → tensors
- Images become patches → embeddings
- Audio becomes features → embeddings
- All paths converge at the **Transformer Model**

Transformer models do not understand words or pixels—they process numbers. **Tokenization** bridges this gap: it converts raw text, images, or even multimodal data into sequences of numbers your model can use. Get tokenization right, and your AI system performs reliably across languages, domains, and modalities. Get it wrong, and you risk errors, lost meaning, or business failures.

Think of tokenization as passport control for your data: it checks, stamps, and prepares each piece before entering the world of machine learning. In this section, you will learn how tokenization works for both text and multimodal data, why it matters for real-world applications, and how to avoid common—and modern—pitfalls.


### From Words and Pixels to Model-Ready Inputs

Tokenization involves two main steps:

1.**Splitting data into tokens**— For text, these can be words, subwords, or characters. For images and multimodal data, tokens can represent image patches, visual features, or other modalities, depending on the tokenizer and model.
2.**Mapping tokens to integer IDs**— Each token gets assigned a unique number from the model's vocabulary (text) or a learned codebook (vision/multimodal).

This process ensures the model receives input it understands. Let's see this in action using Hugging Face's latest tools.


### Basic Tokenization Example with Hugging Face Transformers (2024)

```python
from transformers import AutoTokenizer


# Always use the tokenizer that matches your model version

# Example: Multilingual BERT

tokenizer = AutoTokenizer.from_pretrained('bert-base-multilingual-cased')

text = "Transformers están revolucionando la IA! 🚀"


# Tokenize and map to IDs in one step (recommended)
encoded = tokenizer(text, return_tensors='pt')
print('Input IDs:', encoded['input_ids'])
print('Tokens:', tokenizer.convert_ids_to_tokens(encoded['input_ids'][0]))


# Inspect special tokens
print('Special tokens:', tokenizer.special_tokens_map)

```**Step-by-Step Explanation:**1.**Load multilingual tokenizer**: Handles multiple languages and emojis
2.**Process text**: Tokenizer splits text intelligently
3.**Convert to IDs**: Each token maps to a unique integer
4.**Inspect results**: View tokens and special token mappings

Notice how the tokenizer splits words, handles punctuation, emojis, and assigns each token an integer ID. For multilingual and emoji-rich text, using a multilingual tokenizer avoids information loss. The resulting ID list is what the transformer model actually processes.**Always use the tokenizer designed for your model.**Mixing tokenizers and models leads to errors or unpredictable outputs. For advanced scenarios like domain adaptation or multimodal data, see the next examples.**Multimodal Tokenization**Recent transformer models process images, text, or both (multimodal). For vision, models like ViT (Vision Transformer) split images into patches (visual tokens), while CLIP and BLIP combine text and image tokenization. Tokenization in these settings uses specialized processors converting images into patch embeddings or quantized codes.

Below is an example using a vision transformer tokenizer from Hugging Face:


### Image Tokenization with Hugging Face (ViT Example)

```python
from transformers import AutoImageProcessor
from PIL import Image
import requests


# Load a vision processor (tokenizer for images)
processor = AutoImageProcessor.from_pretrained('google/vit-base-patch16-224')

image_url = '<https://huggingface.co/datasets/huggingface/documentation-images/resolve/main/transformers/tasks/image_classification.png>'
image = Image.open(requests.get(image_url, stream=True).raw)


# Process image into model-ready inputs
inputs = processor(images=image, return_tensors='pt')
print('Pixel values shape:', inputs['pixel_values'].shape)

```**Step-by-Step Explanation:**1.**Load image processor**: Vision models use processors instead of tokenizers
2.**Fetch sample image**: Download from URL using requests
3.**Process image**: Convert to patches and normalize
4.**Check output shape**: Verify tensor dimensions for model input

For multimodal models (e.g., BLIP, CLIP, or Flamingo), tokenization combines both text and image processors. Always refer to the model card and Hugging Face documentation for the correct tokenizer or processor for your model.


# CLIP multimodal tokenization example

from transformers import CLIPProcessor
processor = CLIPProcessor.from_pretrained("openai/clip-vit-base-patch32")


# Processes both text and images together


### Business Implications: Multilingual, Domain-Specific, and Multimodal Data

In real-world data, language and content are messy. A chatbot might receive messages in multiple languages, with emojis, product codes, or even images. Medical or legal documents contain rare jargon or abbreviations. Social media posts often mix text and visuals. Tokenization strategy directly affects how well your AI handles these situations.

-**Multilingual data:**A tokenizer trained only on English may split or drop non-English words and emojis, hurting understanding. Multilingual tokenizers (e.g., 'bert-base-multilingual-cased') or language-agnostic models are preferred for global applications.
-**Domain-specific terms:**If the tokenizer splits or misses key phrases (like 'force majeure' in law or 'HbA1c' in medicine), your model may misinterpret important information. Fine-tuning or training a tokenizer on domain-specific data minimizes unknown tokens ("[UNK]").
-**Multimodal inputs:**For applications combining text, images, or other data (e.g., e-commerce search, document analysis), using the correct multimodal tokenizer or processor proves essential for preserving meaning across modalities.

A robust tokenizer:

- Handles rare and specialized terms
- Reduces unknown or out-of-vocabulary tokens
- Preserves multimodal context
- Improves accuracy and user experience**Takeaway:**If your application involves multiple languages, specialized jargon, or multimodal data, choose or train a tokenizer (or processor) that fits your data. Hugging Face offers multilingual tokenizers, vision processors, and tools for custom tokenization. For details on tokenizer customization and advanced algorithms, see the next section.


### Common Tokenization Pitfalls in 2024

Even experienced practitioners make tokenization mistakes. Stay vigilant for these modern pitfalls:

1.**Mismatched tokenizer and model:**Using a tokenizer from one model (e.g., 'bert-base-uncased') with a different model (e.g., 'roberta-base' or a vision model) scrambles your input. Tokens and IDs won't align, causing errors.
2.**Missing special tokens:**Many models require special tokens for tasks (e.g., [CLS] for classification, [SEP] to separate sentences, or <image> tokens for multimodal models). Forgetting these breaks downstream tasks.
3.**Inconsistent preprocessing:**If you clean, lowercase, or augment data inconsistently, you might introduce subtle bugs. Some tokenizers expect lowercased input, others don't.
4.**Not inspecting outputs:**Always check the tokens and IDs your tokenizer produces—especially with non-standard text, emojis, or images.
5.**Ignoring quantization/compression:**For large-scale or edge deployments, not leveraging modern quantization (like Finite Scalar Quantization, FSQ) leads to inefficient inference or storage.

> 🔍 Tokenization Debugging Checklist:
>
> - [ ]  Tokenizer matches model? (`from_pretrained` names match)
> - [ ]  Special tokens present? (Check with `tokenizer.special_tokens_map`)
> - [ ]  Unknown tokens minimal? (Look for [UNK] in output)
> - [ ]  Padding/truncation set? (For batch processing)


### Detecting a Tokenizer-Model Mismatch (Hugging Face, 2024)

```python

# Example: Using a mismatched tokenizer and model
from transformers import AutoTokenizer, AutoModel

tokenizer = AutoTokenizer.from_pretrained('bert-base-uncased')
model = AutoModel.from_pretrained('roberta-base')

text = "Tokenization mismatch!"
inputs = tokenizer(text, return_tensors='pt')

try:
    outputs = model(**inputs)
except Exception as e:
    print("Error due to mismatched tokenizer and model:", e)

```**Step-by-Step Explanation:**1.**Load mismatched pair**: BERT tokenizer with RoBERTa model
2.**Attempt processing**: Tokenize text and feed to model
3.**Catch error**: Model expects different special tokens and vocabulary
4.**Learn from mistake**: Always match tokenizer and model versions

Here, pairing a BERT tokenizer with a RoBERTa model leads to errors—the input IDs and special tokens don't match what the model expects.**Best practice:**- Always pair your model and tokenizer/processor. Check documentation for required special tokens.
- Inspect tokenization on real data, including edge cases, emojis, and multimodal samples.
- For production, consider modern quantization techniques (like FSQ) to optimize inference and storage. See Article 8 for more on quantization and efficient deployment.


### Key Takeaways and Next Steps**Summary:**- Tokenization prepares text, images, or multimodal data for transformer models by splitting into tokens and mapping to IDs or embeddings
- Always use the matching tokenizer/processor and model—never mix and match
- Inspect token outputs to catch issues early, especially with special tokens, domain-specific terms, or multimodal data
- Tokenization choices affect accuracy, bias, efficiency, and user experience
- For production, leverage quantization techniques (e.g., FSQ) to optimize performance and storage**Try it yourself:**Tokenize a sentence or image from your domain (with jargon, emojis, or multiple languages). What do you notice? For more on tokenizer algorithms, multimodal tokenization, and customization, continue to the next section.# Tokenization Algorithms and Their Tradeoffs

```mermaid
classDiagram
  class TokenizationAlgorithm {
    +vocabulary: dict
    +vocab_size: int
    +tokenize(text): List~string~
    +encode(text): List~int~
    +decode(ids): string
  }

  class BPE {
    +merge_rules: List
    +learn_bpe(corpus)
    +apply_merges(text)
  }

  class WordPiece {
    +prefix: string = "##"
    +greedy_search(text)
    +maximize_likelihood(corpus)
  }

  class Unigram {
    +probabilities: dict
    +compute_best_segmentation(text)
    +sample_segmentation(text)
  }

  TokenizationAlgorithm <|-- BPE
  TokenizationAlgorithm <|-- WordPiece
  TokenizationAlgorithm <|-- Unigram

  class Model {
    +name: string
    +tokenizer_type: string
  }

  BPE <-- Model : GPT, RoBERTa
  WordPiece <-- Model : BERT family
  Unigram <-- Model : XLNet, ALBERT

```**Step-by-Step Explanation:**-**TokenizationAlgorithm**base class defines common interface
-**BPE**learns merge rules and applies them iteratively
-**WordPiece**uses greedy search with ## prefix for subwords
-**Unigram**computes probabilities for best segmentation
- Each algorithm associates with specific model families

Tokenization is more than a technical detail—it shapes your model's speed, accuracy, and ability to handle real-world language. The algorithm you choose directly affects how your model processes new words, typos, and specialized terms. In this section, we'll break down the three most common tokenization algorithms in modern NLP: Byte Pair Encoding (BPE), WordPiece, and the Unigram Language Model. You'll see how each works, where it excels (or falls short), and how to pick the right one for your data.

For most workflows, you'll use the Hugging Face `transformers` and `tokenizers` libraries, which offer fast, production-ready implementations and make customization easy. As you'll see later, aligning your tokenizer with both your model architecture and dataset preprocessing proves essential for optimal results.

> Future Directions: Recent research explores tokenizer-free and character-level models (like ByT5 and Charformer) that operate directly on bytes or characters without explicit tokenization. While still emerging, these approaches may become more prominent in the next generation of language models, especially for multilingual or noisy data.
>


### Byte Pair Encoding (BPE)

Byte Pair Encoding (BPE) starts simple: it treats every character as a token, then repeatedly merges the most common pairs to form longer subwords. This keeps vocabulary small but flexible. Even if a word is new, BPE can break it into familiar pieces—great for handling typos, slang, or names. Researchers originally used BPE for data compression, but it's now a workhorse in NLP models like GPT and RoBERTa.

When using Hugging Face, you'll typically load a BPE tokenizer through `transformers.AutoTokenizer`, but for custom tokenizers or large-scale training, the `tokenizers` library provides high-speed, multi-core implementations.


### Tokenizing 'unhappiness' with BPE (RoBERTa Example)

```python
from transformers import AutoTokenizer


# Load RoBERTa's BPE tokenizer

# The .tokenize() method remains current as of Hugging Face Transformers v5.x

# For large/custom workflows, see the 'tokenizers' library

tokenizer = AutoTokenizer.from_pretrained('roberta-base')
text = 'unhappiness'
tokens = tokenizer.tokenize(text)
print('BPE Tokens:', tokens)  # Example output: ['un', 'happi', 'ness']

```**Step-by-Step Explanation:**1.**Load BPE tokenizer**: RoBERTa uses BPE algorithm
2.**Tokenize word**: BPE splits based on learned merge rules
3.**View subwords**: Common prefixes/suffixes remain intact
4.**Understand flexibility**: New words get reasonable splits

Here, RoBERTa's BPE tokenizer splits 'unhappiness' into subwords like 'un', 'happi', and 'ness'. Even if the whole word wasn't in training data, the model can still process it. BPE shines for general English, noisy data, and domains where new words pop up often.**Key takeaway:**BPE is fast and robust to rare words and typos, but may split technical terms in unexpected ways. For custom workflows or large datasets, use the Hugging Face `tokenizers` library for efficient, parallelized training and integration with `transformers`.


### WordPiece and Unigram Models

Let's compare BPE with two other leading algorithms: WordPiece and the Unigram Language Model.**WordPiece**builds its vocabulary to maximize how well it represents training data. It uses a greedy algorithm—at each step, it chooses the longest known subword it can find. (A greedy algorithm means it always picks the best local option, without looking ahead.) This leads to consistent splits, which helps with technical terms and languages with clear word boundaries.

WordPiece is the default in BERT-family models and remains a production standard. The Hugging Face `transformers` and `tokenizers` libraries both provide efficient, up-to-date implementations.


### Tokenizing 'unhappiness' with WordPiece (BERT Example)

```python
from transformers import AutoTokenizer


# Load BERT's WordPiece tokenizer

# .tokenize() is current; for custom training, use the 'tokenizers' library

tokenizer = AutoTokenizer.from_pretrained('bert-base-uncased')
text = 'unhappiness'
tokens = tokenizer.tokenize(text)
print('WordPiece Tokens:', tokens)  # Example output: ['un', '##happi', '##ness']

```**Step-by-Step Explanation:**1.**Load WordPiece tokenizer**: BERT's default algorithm
2.**Notice ## prefix**: Marks continuation of words
3.**Observe consistency**: Similar words get similar splits
4.**Appreciate precision**: Technical terms often preserved better

Notice the '##' prefix. WordPiece uses this to mark tokens that continue a word. The splits are consistent and often more intuitive for technical domains.**Key takeaway:**WordPiece is precise and consistent, but can produce longer token sequences for rare or complex words.**Unigram Language Model**takes a different approach. It starts with a large vocabulary and uses probability to pick the best segmentation for each word. (In other words, it doesn't always split the same way—it chooses the split that most likely explains the data.) This flexibility powers languages where words are built from many smaller units, like Japanese or Finnish (these are called agglutinative languages).

Unigram tokenization is used in models like XLNet, ALBERT, and XLM-RoBERTa. For high-performance training or custom vocabularies, use the Hugging Face `tokenizers` library, which supports Unigram with parallel processing.


### Tokenizing 'unhappiness' with Unigram (XLM-RoBERTa Example)

```python
from transformers import AutoTokenizer


# Load XLM-RoBERTa's Unigram tokenizer

# .tokenize() is current and supported

tokenizer = AutoTokenizer.from_pretrained('xlm-roberta-base')
text = 'unhappiness'
tokens = tokenizer.tokenize(text)
print('Unigram Tokens:', tokens)  # Example output: ['un', 'happiness'] or ['un', 'happi', 'ness']

```**Step-by-Step Explanation:**1.**Load Unigram tokenizer**: XLM-RoBERTa's choice for multilingual
2.**Observe variability**: Splits may vary by context
3.**Note flexibility**: Handles morphologically rich languages well
4.**Consider use case**: Best for agglutinative languages

Here, the split may vary depending on vocabulary. This makes Unigram especially good for languages with complex word structures.**Key takeaway:**Unigram offers flexible, probabilistic splits—ideal for agglutinative or morphologically rich languages.

All three algorithms—BPE, WordPiece, and Unigram—are supported in the Hugging Face `tokenizers` library, recommended for custom workflows, large-scale training, and maximum speed.

Let's see a side-by-side comparison for the word 'unhappiness':

-**BPE:**['un', 'happi', 'ness']
-**WordPiece:**['un', '##happi', '##ness']
-**Unigram:**['un', 'happiness'] or ['un', 'happi', 'ness']

This illustrates how each algorithm segments the same word differently.


### Comparative Strengths, Weaknesses, and Choosing the Right Tokenizer

Let's recap the main tradeoffs:

| Algorithm | Strengths | Weaknesses | Best For |
| --- | --- | --- | --- |
| BPE | Fast, robust to rare words/typos | May split technical terms oddly | General English, noisy data |
| WordPiece | Consistent, precise splits | Longer token sequences for rare words | Technical, multilingual, clear boundaries |
| Unigram | Flexible, handles complex words | Slower to train, less intuitive splits | Agglutinative or morphologically rich |**How to choose:**- Using a pre-trained model? Stick with its original tokenizer for best results
- Mostly English or European languages? BPE or WordPiece are safe bets
- Lots of jargon or new terms? Consider training a custom tokenizer using the Hugging Face `tokenizers` library (see next section)
- Working with Asian or agglutinative languages? Unigram often performs best**Practical best practices:**- Always test tokenization on real samples from your data. Poor tokenization reduces accuracy, increases costs, or introduces subtle biases
- Ensure your tokenizer aligns with both model architecture and dataset preprocessing pipeline. Mismatches degrade performance, especially in specialized domains
- For large-scale or streaming data, explore on-the-fly tokenization using the Hugging Face `tokenizers` library for maximum efficiency

> Emerging Trends: Tokenizer-free and character-level models (such as ByT5 and Charformer) are being actively researched. While not yet mainstream in production, they may shape the future of language modeling, especially for highly multilingual or noisy data.
>

Want to go deeper? The next section, "Practical Tokenization with Hugging Face," shows how to customize and debug tokenizers for your own projects. For more on how tokenization fits into the NLP pipeline, see Article 2 ("Foundations of NLP") and Article 11 ("Dataset Curation and Training Language Models from Scratch").**Try this:**Tokenize a few domain-specific words from your own data using different algorithms. Which split makes the most sense for your application?


# Practical Tokenization with Hugging Face

```mermaid
stateDiagram-v2
  [*] --> LoadTokenizer: Start
  LoadTokenizer --> PreTrained: Use existing model
  LoadTokenizer --> Custom: Train new tokenizer

  PreTrained --> Tokenize: AutoTokenizer.from_pretrained()
  Custom --> PrepareData: Collect domain corpus
  PrepareData --> TrainTokenizer: train_new_from_iterator()
  TrainTokenizer --> SaveTokenizer: save_pretrained()
  SaveTokenizer --> Tokenize

  Tokenize --> BatchProcess: Process multiple texts
  Tokenize --> SingleText: Process one text

  BatchProcess --> AddPadding: padding=True
  BatchProcess --> Truncate: truncation=True

  SingleText --> GetTokens: tokenizer.tokenize()
  SingleText --> GetIDs: tokenizer.encode()

  AddPadding --> OutputTensors: return_tensors='pt'
  Truncate --> OutputTensors
  GetTokens --> Debug: Inspect tokens
  GetIDs --> Debug

  OutputTensors --> [*]: Model ready
  Debug --> [*]: Analysis complete

  style LoadTokenizer fill:#bbdefb,stroke:#1976d2,stroke-width:1px,color:#333333
  style Custom fill:#fff9c4,stroke:#f9a825,stroke-width:1px,color:#333333
  style Tokenize fill:#c8e6c9,stroke:#43a047,stroke-width:1px,color:#333333

```**Step-by-Step Explanation:**- Process starts with**LoadTokenizer**choosing pre-trained or custom
-**PreTrained**path uses existing models via `from_pretrained()`
-**Custom**path involves data preparation, training, and saving
-**Tokenize**handles single or batch processing
-**BatchProcess**adds padding and truncation for efficiency
- Outputs either tensors for models or tokens for debugging

Tokenization is the gateway to every transformer pipeline. But knowing the theory is only half the story. To build robust NLP systems, you need practical skills: loading the right tokenizer, adapting it to your data, and debugging tricky cases. The Hugging Face ecosystem makes all of this accessible—even for complex workflows.

In this section, you'll learn how to:

- Use pre-built tokenizers for popular models
- Train and integrate custom tokenizers for specialized domains using the latest APIs
- Debug, visualize, and align tokenization outputs for advanced NLP tasks

Let's dive in and see how you can bridge the gap from raw text to model-ready tensors using up-to-date, production-grade workflows.**Note:**For reproducibility and compatibility, always specify library versions in your environment. As of 2025, we recommend:

```bash
pip install "transformers>=4.38.0" "tokenizers>=0.15.0"
Using the Tokenizers Library
Most projects start with a pre-trained tokenizer. Each Hugging Face tokenizer is designed to match its model’s vocabulary, tokenization algorithm, and special tokens, avoiding subtle errors. The transformers library provides AutoTokenizer to simplify loading the right tokenizer for any model. Modern tokenizers also support alignment information, essential for tasks like named entity recognition (NER) and question answering.
Tokenizing a Batch of Sentences with Alignment
from transformers import AutoTokenizer


# Load the BERT tokenizer (downloads vocab and config)
tokenizer = AutoTokenizer.from_pretrained('bert-base-uncased')

sentences = [
    "Tokenization is fun!",
    "Let's build smarter models."
]


# Tokenize the batch, including alignment info
encoded = tokenizer(
    sentences,
    padding=True,                # Pad to the longest sentence
    truncation=True,             # Truncate if too long
    return_tensors='pt',         # PyTorch tensors ('tf' for TensorFlow)
    return_offsets_mapping=True  # Get character-to-token alignment
)

print('Input IDs:', encoded['input_ids'])
print('Offsets:', encoded['offset_mapping'])

```**Step-by-Step Explanation:**1.**Load the Tokenizer:**`AutoTokenizer.from_pretrained('bert-base-uncased')` fetches the correct vocabulary and configuration, ensuring tokenization matches the model.
2.**Batch Tokenization:**Passing a list of sentences lets the tokenizer process them efficiently in one call—essential for fast training and inference.
3.**Padding and Truncation:**`padding=True` makes all sentences the same length for batching. `truncation=True` avoids input length errors.
4.**Tensor Output:**`return_tensors='pt'` returns PyTorch tensors. To use TensorFlow, set `return_tensors='tf'`.
5.**Alignment Information:**`return_offsets_mapping=True` adds character-to-token alignment, useful for mapping model outputs back to original text.

Want plain Python lists? Just omit the `return_tensors` argument.

Hugging Face tokenizers automatically add special tokens (like `[CLS]` and `[SEP]` for BERT), so you don't have to manage them manually.**Tip:**Always use the tokenizer that matches your model. Mixing tokenizers and models can silently degrade accuracy or cause runtime errors.


### TensorFlow Output Example

```python

# For TensorFlow tensors, use:
encoded_tf = tokenizer(
    sentences,
    padding=True,
    truncation=True,
    return_tensors='tf',
    return_offsets_mapping=True
)
print('TF Input IDs:', encoded_tf['input_ids'])
Now that you’ve seen the basics, let’s explore handling specialized data with custom tokenizers using the latest Hugging Face APIs.
Customizing Tokenizers for New Domains
Pre-trained tokenizers excel at general tasks, but what if your data brims with medical terms, legal jargon, or unique abbreviations? Off-the-shelf vocabularies may split important words into awkward subwords, hurting model performance.
If your data contains many out-of-vocabulary terms, consider training a custom tokenizer. This ensures critical words tokenize as intended and lets you choose the best algorithm for your domain.
The latest Hugging Face Transformers library (>=4.26) provides an integrated, high-level API—AutoTokenizer.train_new_from_iterator—for training custom tokenizers from an iterable of text. You can choose among algorithms like BPE, WordPiece, and Unigram (SentencePiece).
Training a Custom Tokenizer with Hugging Face (Modern Approach)
from transformers import AutoTokenizer


# texts: an iterable (e.g., list or generator) of domain-specific sentences
texts = [
    "Patient exhibits signs of pneumothorax.",
    "CT scan reveals bilateral infiltrates.",
    # ... more sentences
]


# Train a custom Byte-Pair Encoding (BPE) tokenizer

# You can also set 'tokenizer_type' to 'unigram' or 'wordpiece' for other algorithms
tokenizer = AutoTokenizer.train_new_from_iterator(
    texts,
    vocab_size=5000,
    tokenizer_type="bpe"  # Options: "bpe", "wordpiece", "unigram"
)

tokenizer.save_pretrained("./custom_tokenizer")

```**Step-by-Step Explanation:**1.**Corpus Preparation:**Collect domain-specific text in plain text files or as a Python iterable. More data yields better vocabularies, but even a few thousand sentences help.
2.**Algorithm Choice:**Specify `tokenizer_type`—choose "bpe" (Byte-Pair Encoding), "wordpiece", or "unigram" (SentencePiece) depending on your needs. See Article 5 for detailed comparison.
3.**Training:**`train_new_from_iterator` learns a vocabulary of frequent tokens. `vocab_size` limits the number of unique tokens.
4.**Saving:**Use `save_pretrained()` to store all tokenizer files and configuration for seamless integration.**Mini-challenge:**Try preparing a small corpus from your own domain and train a tokenizer on it using this high-level API.

To use your custom tokenizer in Hugging Face workflows, always load it with the standard `from_pretrained` method for full compatibility:


### Loading a Custom Tokenizer (Recommended Method)

```python
from transformers import AutoTokenizer

custom_tokenizer = AutoTokenizer.from_pretrained("./custom_tokenizer")

sample = "Patient exhibits signs of pneumothorax."

# Tokenize and get alignment info
tokens = custom_tokenizer.tokenize(sample)
ids = custom_tokenizer.encode(sample)
offsets = custom_tokenizer(
    sample, return_offsets_mapping=True, return_tensors=None
)["offset_mapping"]

print('Custom Tokens:', tokens)
print('Token IDs:', ids)
print('Offsets:', offsets)

```**Step-by-Step Explanation:**1.**Load custom tokenizer**: Use standard `from_pretrained` method
2.**Test tokenization**: See how domain terms are handled
3.**Get multiple views**: Tokens, IDs, and alignment offsets
4.**Verify quality**: Check if important terms stay intact

This approach ensures your tokenizer and model vocabulary match your data. If you plan to train a model from scratch, always use the same tokenizer for both training and inference.**Business example:**A healthcare startup fine-tunes a clinical BERT model for radiology reports. By training a custom tokenizer on radiology text, they keep terms like 'pneumothorax' as whole tokens, improving classification accuracy.**Best Practice:**Use `save_pretrained` and `from_pretrained` for both models and tokenizers to guarantee compatibility with the Hugging Face Hub and all downstream workflows.**Reproducibility Tip:**Always document your tokenizer training parameters and pin your `transformers` and `tokenizers` versions.

In summary: Custom tokenizers prove essential for specialized domains. They help your model "speak the language" of your data. For more on tokenizer algorithms and tradeoffs, see Article 5.


### Debugging and Visualizing Tokenization

Even the best tokenizers can surprise you—especially with noisy, multilingual, or technical text. Debugging and visualization help you catch mistakes before they reach your model. Modern Hugging Face tokenizers provide alignment (offset) mappings and easy ways to inspect tokenization.


### Visualizing Tokenization Output and Alignment

```python
text = "Let's test: 🤖 transformers!"
output = tokenizer(
    text,
    return_offsets_mapping=True,
    return_tensors=None
)
tokens = tokenizer.convert_ids_to_tokens(output['input_ids'])
offsets = output['offset_mapping']

for token, (start, end) in zip(tokens, offsets):
    print(f"{token}: [{start}, {end}] -> '{text[start:end]}'")

```**Step-by-Step Explanation:**1.**Tokenization:**The tokenizer splits input into subword tokens (not words!). This is how the model "sees" your text.
2.**Token IDs:**Each token maps to an integer ID with `convert_ids_to_tokens`. These IDs are what the model processes.
3.**Alignment:**`offset_mapping` shows start and end character positions of each token in original text—critical for tasks like NER or error analysis.
4.**Inspection:**Print tokens and their corresponding character spans to spot unexpected splits or unknown tokens (like `[UNK]`).**Why this matters:**- If key words split into subwords, your model may lose meaning
- Emojis or rare symbols may become `[UNK]`, hurting performance for chat or social media data
- Special tokens (e.g., `[CLS]`, `[SEP]`) often insert automatically. Always check if they appear where needed**Pro tip:**Test tokenization on real, messy data—slang, typos, or code—to ensure robustness.

Want to go deeper? The Hugging Face Tokenizers library offers advanced visualization tools, and you can compare outputs with libraries like spaCy or NLTK for cross-validation. For more on tokenization inspection and debugging, see Article 17: Debugging Training Pipelines.

Quick recap:

- Always match the tokenizer to your model
- Visualize tokenization and alignment on real data to catch surprises
- Customize your tokenizer for domain-specific language
- Use `save_pretrained` and `from_pretrained` for robust, future-proof workflows

For a deeper dive into tokenization algorithms, revisit Article 5. For dataset curation tips, see Article 11.


# Key Takeaways

Tokenization is where every transformer journey begins. It converts raw text into tokens and numerical IDs—formats models can understand. Think of tokenization as pouring the foundation for a skyscraper: get it right, and everything built on top stands strong.

A good tokenizer preserves meaning, structure, and special elements in your data. This single step shapes how well your models process language, whether you're building a chatbot, a search engine, or analyzing legal documents.

Let's break down the most important lessons, with practical examples and tips to guide you in real projects.


### 1. Tokenization: The Essential First Step

Every transformer pipeline starts by converting text into tokens—small units like words, subwords, or even characters. These tokens map to numerical IDs ("tensor-ready IDs"), which are just arrays models can process.


### Basic Tokenization Pipeline

```python
from transformers import AutoTokenizer


# Always match the tokenizer to your model

# Use the latest model checkpoint as needed
tokenizer = AutoTokenizer.from_pretrained('bert-base-uncased')

text = "Tokenization is the foundation of NLP."
encoded = tokenizer(text, return_tensors='pt')  # Convert to PyTorch tensors

print('Tokens:', tokenizer.tokenize(text))
print('Token IDs:', encoded['input_ids'])

# Sample output:

# Tokens: ['tokenization', 'is', 'the', 'foundation', 'of', 'nlp', '.']

# Token IDs: tensor([[19204, 2003, 1996, 4566, 1997, 17953, 1012]])

```**Step-by-Step Explanation:**1.**Load tokenizer**: Matches BERT model's vocabulary
2.**Process text**: Convert to tokens and IDs in one call
3.**Get tensors**: Ready for PyTorch model input
4.**Inspect output**: Verify tokenization quality

This pipeline forms the entry point for all transformer models. Without tokenization, models can't process language at all.


### 2. Tokenizer Choice and Customization: Why It Matters

Your tokenizer affects performance, especially for multilingual, noisy, or domain-specific data. Off-the-shelf tokenizers work well for general tasks, but you may need to train your own for specialized vocabularies (like medical or legal terms) or underrepresented languages.


### Training a Custom Tokenizer with train_new_from_iterator

```python
from transformers import AutoTokenizer


# Suppose 'texts' is an iterator or list of strings from your domain corpus
base_tokenizer = AutoTokenizer.from_pretrained('bert-base-uncased')


# Train a new tokenizer on your domain data
new_tokenizer = base_tokenizer.train_new_from_iterator(
    texts, vocab_size=3000
)


# Save for future use and sharing
new_tokenizer.save_pretrained('./my_custom_tokenizer')

```**Step-by-Step Explanation:**1.**Start with base**: Use existing tokenizer as template
2.**Train on domain**: Learn vocabulary from your specific data
3.**Control size**: Set vocab_size for efficiency
4.**Save properly**: Use save_pretrained for Hub compatibility

The train_new_from_iterator method is now the recommended way to train custom tokenizers within the Hugging Face Transformers ecosystem. It ensures full compatibility with downstream models and the Model Hub.

Custom tokenizers let you control vocabulary size and adapt to your data. This proves crucial when default tokenizers miss important terms or when handling highly specialized or multilingual corpora.


### 3. Hugging Face Tokenization Tools: Flexible and Powerful

-**AutoTokenizer**: Loads the right tokenizer for any pretrained model from the Hub
-**train_new_from_iterator**: Modern, integrated way to train custom tokenizers for your data
-**Special Token Management**: Use `add_special_tokens` and `special_tokens_map` for robust handling
-**Integration**: Works seamlessly with datasets and pipelines, reducing errors and boilerplate


### Batch Tokenization with Padding and Truncation (Production-Ready)

```python
sentences = [
    "Transformers are powerful.",
    "Tokenization makes them work!"
]


# Batch tokenize, pad, and truncate
encoded_batch = tokenizer(
    sentences,
    padding=True,        # Pad to same length
    truncation=True,     # Truncate if too long
    return_tensors='pt'  # PyTorch tensors
)


# For production or API use: convert tensors to lists for JSON serialization
input_ids_list = encoded_batch['input_ids'].cpu().tolist()

print('Batch Input IDs:', input_ids_list)

```**Step-by-Step Explanation:**1.**Process batch**: Handle multiple texts efficiently
2.**Pad uniformly**: All sequences same length for batching
3.**Truncate safely**: Prevent length errors
4.**Convert for APIs**: Lists serialize to JSON easily

Batch processing, padding, and truncation prove critical for efficient training and inference—especially in real-world pipelines. Always convert tensors to lists when integrating with APIs or saving outputs in JSON format.


### 4. Modern Special Token Handling and Debugging

Tokenization bugs can quietly break your models. Mismatched tokenizers, missing special tokens, or odd splits cause subtle errors. Always inspect outputs—just like a chef tastes before serving.


### Inspecting and Adding Special Tokens

```python

# Inspect current special tokens
print('Special tokens:', tokenizer.special_tokens_map)


# Add custom special tokens if needed
special_tokens_dict = {'additional_special_tokens': ['<CUSTOM>']}
num_added = tokenizer.add_special_tokens(special_tokens_dict)
print(f'Added {num_added} special tokens.')


# Visualize tokenization with special tokens
text = "Classify this sentence."
encoded = tokenizer(text)
print('Tokens with Special Tokens:', tokenizer.convert_ids_to_tokens(encoded['input_ids']))

# Example output: ['[CLS]', 'classify', 'this', 'sentence', '.', '[SEP]']

```**Step-by-Step Explanation:**1.**Check existing**: View current special tokens
2.**Add custom**: Extend for special use cases
3.**Update model**: Remember to resize embeddings if adding tokens
4.**Verify output**: Ensure special tokens appear correctly

Special tokens like [CLS] (classification), [SEP] (separator), and custom tokens are required by many models. If they're missing or misconfigured, your model may underperform or fail. Use `add_special_tokens` to robustly extend tokenizers for custom tasks.**Pro Tip:**Test tokenization with edge cases—emojis, typos, or domain jargon. For example, the sentence "I love pizza! 🍕🔥" might split the emoji incorrectly if your tokenizer isn't prepared. Catch these issues early by visualizing tokens and IDs.


### 5. Unicode, Multilingual, and Byte-Level Tokenization

Modern large language models (LLMs) increasingly use byte-level or character-level tokenization strategies (such as SentencePiece, Unigram, or byte-level BPE) to better handle multilingual, noisy, and non-standard text. Models like GPT-4 and Llama-2/3 leverage these approaches for improved robustness and coverage. Consider these strategies for projects with diverse language requirements or high variance in input data.


### 6. Business Impact: Tokenization in the Real World

Tokenization isn't just technical—it shapes business outcomes. Good tokenization improves accuracy in multilingual bots, reduces errors in contract analysis, and boosts recall for search engines. Poor tokenization drops vital information, introduces bias, or breaks downstream systems.

Once you can debug tokenization, you better understand its impact in real business settings.


### 7. Recent Developments: Token Reduction and Efficiency

Recent research explores token reduction not only for inference speed but also for improving training stability and model robustness. Techniques such as selective token pruning and token-aware loss functions integrate into modern transformer training pipelines. While not yet standard in Hugging Face APIs, these developments likely shape future best practices.


### Key Takeaways

- Tokenization forms the first and most critical step in transformer pipelines
- The right tokenizer—off-the-shelf or custom—directly affects results
- Use train_new_from_iterator for custom tokenizers and manage special tokens with add_special_tokens
- Hugging Face tools make tokenization fast, flexible, and production-ready
- Always debug and visualize tokenization to avoid subtle bugs
- Stay informed about token-efficient modeling and multilingual tokenization trends

By mastering tokenization, you unlock the full power of modern language models and set the stage for robust, reliable AI systems.


### Looking Ahead

With tokenization under your belt, you're ready to shape how models think. Next, dive into prompt engineering (see Article 6) to guide model outputs. For more on building high-quality datasets and robust pipelines, see Article 11. Remember: every great AI solution starts with great tokenization.


## Summary

Tokenization is the critical first step in every transformer-based NLP pipeline, converting raw human language into structured, model-ready data. This chapter explored why tokenization matters, the algorithms behind it, and how to wield Hugging Face's tools for practical, robust solutions. By mastering tokenization, you lay the foundation for every advanced technique to come—ensuring your models understand, process, and generate language with precision. Next, you'll build on these skills as you learn about prompt engineering and dataset curation in subsequent articles.

---

Now, let’s actually use the examples.***If you like this article, follow Rick on [LinkedIn](https://www.linkedin.com/in/rickhightower/) or [Medium](https://medium.com/@richardhightower) for more enterprise AI and AI insights.***Be sure to check out the first four articles in this series:

1. [Hugging Faces Transformers and the AI Revolution (Article 1)](https://medium.com/@richardhightower/transformers-and-the-ai-revolution-the-role-of-hugging-face-f185f574b91b)
2. [Hugging Faces: Why Language is Hard for AI? How Transformers Changed that (Article 2)](https://medium.com/@richardhightower/why-language-is-hard-for-ai-and-how-transformers-changed-everything-d8a1fa299f1e)
3. [Hands-On with Hugging Face: Building Your AI Workspace (Article 3)](https://medium.com/@richardhightower/hands-on-with-hugging-face-building-your-ai-workspace-b23c7e9be3a7)
4. [Inside the Transformer: Architecture and Attention Demystified (Article 4)](https://medium.com/@richardhightower/inside-the-transformer-architecture-and-attention-demystified-39b2c13130bd)


# **Instructions for using the GitHub Repo**#**Tokenization — Converting Text to Numbers for Neural Networks**This project contains working examples for Article 5: Tokenization from the Hugging Face Transformers series.

🔗 GitHub Repository: [https://github.com/RichardHightower/art_hug_05](https://github.com/RichardHightower/art_hug_05)


# **Prerequisites**- Python 3.12 (managed via pyenv).
- Poetry for dependency management.
- Go Task for build automation.
- API keys for any required services (see .env.example).


# **Setup**1. Clone this repository:
git clone git@github.com:RichardHightower/art_hug_05.git cd art_hug_05
2. Run the setup task:
task setup
3. Copy `.env.example` to `.env` and configure as needed


# **Project Structure**```
.
├── src/
│   ├── __init__.py
│   ├── config.py              # Configuration and utilities
│   ├── main.py                # Entry point with all examples
│   ├── tokenization_examples.py       # Basic tokenization examples
│   ├── tokenization_algorithms.py     # BPE, WordPiece, and Unigram comparison
│   ├── custom_tokenization.py         # Training custom tokenizers
│   ├── tokenization_debugging.py      # Debugging and visualization tools
│   ├── multimodal_tokenization.py     # Image and CLIP tokenization
│   ├── advanced_tokenization.py       # Advanced tokenization techniques
│   ├── model_loading.py               # Model loading examples
│   └── utils.py               # Utility functions
├── tests/
│   └── test_examples.py       # Unit tests
├── .env.example               # Environment template
├── Taskfile.yml               # Task automation
└── pyproject.toml             # Poetry configuration
Running ExamplesRun all examples:
task run
Or run individual modules:
task run-tokenization          # Run basic tokenization examples
task run-algorithms            # Run tokenization algorithms comparison
task run-custom                # Run custom tokenizer training
task run-debugging             # Run tokenization debugging tools
task run-multimodal            # Run multimodal tokenization
task run-advanced              # Run advanced tokenization techniques
task run-model-loading         # Run model loading examples
Loading NotebooksTo launch Jupyter notebooks:
task notebook
This will start a Jupyter server where you can:
- Create interactive notebooks for experimentation
- Run code cells step by step
- Visualize tokenization results
- Test different tokenizers interactively
Available Tasks- task setup - Set up Python environment and install dependencies
task run- Run all examplestask run-tokenization- Run basic tokenization examplestask run-algorithms- Run algorithm comparison examplestask run-custom- Run custom tokenizer trainingtask run-debugging- Run debugging and visualization toolstask run-multimodal- Run multimodal tokenization examplestask run-advanced- Run advanced tokenization techniquestask run-model-loading- Run model loading examplestask notebook- Launch Jupyter notebook servertask test- Run unit teststask format- Format code with Black and Rufftask lint- Run linting checks (Black, Ruff, mypy)task clean- Clean up generated files
Setting Up Python and Go Task on Mac and Windows#Installing Python#On macOS1.Using Homebrew (Recommended):```
brew install pyenv
2. Install Python 3.12 using pyenv:
pyenv install 3.12.0 pyenv global 3.12.0
3. Verify installation:
python –version
# **On Windows**1. Download the installer from [Python.org](https://www.python.org/downloads/)
2. Run the installer and ensure you check “Add Python to PATH”
3. Open Command Prompt and verify installation:
python –version
4. Install pyenv for Windows (optional):
pip install pyenv-win
# **Installing Poetry**#**On macOS**1. Install using the official installer:
curl -sSL https://install.python-poetry.org | python3 -
2. Add Poetry to your PATH:
echo ’export PATH="$HOME/.poetry/bin:$PATH"’ » ~/.zshrc source ~/.zshrc
# **On Windows**1. Install using PowerShell:
(Invoke-WebRequest -Uri https://install.python-poetry.org -UseBasicParsing).Content | python -
2. Add Poetry to your PATH (the installer should do this automatically)

3. Verify installation:
poetry –version
# **Installing Go Task**#**On macOS**1. Using Homebrew:
brew install go-task/tap/go-task
2. Verify installation:
task –version
# **On Windows**1. Using Scoop:
scoop install go-task
2. Or using Chocolatey:
choco install go-task
3. Or download directly from [GitHub Releases](https://github.com/go-task/task/releases) and add to your PATH

4. Verify installation:
task –version
# **Setting Up The Project**After installing all prerequisites, you can follow the setup instructions in the previous section to get the project running.


# **Troubleshooting Common Issues**-**Python not found**: Ensure Python is correctly added to your PATH variable
-**Poetry commands not working**: Restart your terminal or add the Poetry bin directory to your PATH
-**Task not found**: Verify Task installation and PATH settings
-**Dependency errors**: Run `poetry update` to resolve dependency conflicts

We created an example that compares specialized medical tokenization to non-medical tokenization.
% task run-medical
task: [run-medical] poetry run python src/medical_tokenization_demo.py INFO:main:🏥 Medical Tokenization Examples INFO:main:================================================== INFO:main: === Generic vs Domain Tokenization === INFO:main: ‘pneumonoultramicroscopicsilicovolcanoconiosis’: INFO:main: Generic: [‘p’, ‘##ne’, ‘##um’, ‘##ono’, ‘##ult’, ‘##ram’, ‘##ic’, ‘##ros’, ‘##copic’, ‘##sil’, ‘##ico’, ‘##vo’, ‘##lc’, ‘##ano’, ‘##con’, ‘##ios’, ‘##is’] (17 tokens) WARNING:main: ⚠️ Excessive fragmentation: 17 pieces INFO:main: ’electroencephalography’: INFO:main: Generic: [’electro’, ‘##ence’, ‘##pha’, ‘##log’, ‘##raphy’] (5 tokens) WARNING:main: ⚠️ Excessive fragmentation: 5 pieces INFO:main: ’thrombocytopenia’: INFO:main: Generic: [’th’, ‘##rom’, ‘##bo’, ‘##cy’, ‘##top’, ‘##enia’] (6 tokens) WARNING:main: ⚠️ Excessive fragmentation: 6 pieces INFO:main: ‘gastroesophageal’: INFO:main: Generic: [‘gas’, ‘##tro’, ‘##es’, ‘##op’, ‘##ha’, ‘##ge’, ‘##al’] (7 tokens) WARNING:main: ⚠️ Excessive fragmentation: 7 pieces INFO:main: === MedCPT Biomedical Text Encoder Example === INFO:main:Loading MedCPT Article Encoder… INFO:main: Embedding shape: torch.Size([3, 768]) INFO:main:Embedding dimension: 768 INFO:main: === MedCPT Tokenization of Medical Terms === INFO:main: ‘diabetes insipidus’: INFO:main: Tokens: [‘diabetes’, ‘ins’, ‘##ip’, ‘##idus’] (4 tokens) INFO:main: ‘vasopressinergic neurons’: INFO:main: Tokens: [‘vasopressin’, ‘##ergic’, ’neurons’] (3 tokens) INFO:main: ‘hypothalamic destruction’: INFO:main: Tokens: [‘hypothalamic’, ‘destruction’] (2 tokens) INFO:main: ‘polyuria and polydipsia’: INFO:main: Tokens: [‘poly’, ‘##uria’, ‘and’, ‘polyd’, ‘##ips’, ‘##ia’] (6 tokens) INFO:main: === Comparison with Generic BERT === INFO:main: ‘diabetes insipidus’: INFO:main: MedCPT: 4 tokens INFO:main: Generic BERT: 5 tokens INFO:main: ✅ MedCPT is 1 tokens more efficient INFO:main: ‘vasopressinergic neurons’: INFO:main: MedCPT: 3 tokens INFO:main: Generic BERT: 6 tokens INFO:main: ✅ MedCPT is 3 tokens more efficient INFO:main: ‘hypothalamic destruction’: INFO:main: MedCPT: 2 tokens INFO:main: Generic BERT: 6 tokens INFO:main: ✅ MedCPT is 4 tokens more efficient INFO:main: ‘polyuria and polydipsia’: INFO:main: MedCPT: 6 tokens INFO:main: Generic BERT: 7 tokens INFO:main: ✅ MedCPT is 1 tokens more efficient INFO:main: ✅ Medical tokenization examples completed!
You can see that the specialized model is more efficient for medical terminology than the generic model.

Let’s examine the code that powers our medical tokenization demonstration. The script below compares how specialized medical tokenizers handle complex medical terminology compared to generic tokenizers. As we saw in the output above, domain-specific tokenizers like MedCPT significantly reduce token fragmentation for medical terms, which can lead to more efficient processing and better understanding of medical text.
""" Medical Tokenization Demo Standalone script to run medical tokenization examples """
from transformers import AutoTokenizer, AutoModel import torch import logging
Configure logging
logging.basicConfig(level=logging.INFO) logger = logging.getLogger(name)
def compare_medical_tokenization(): “““Shows advantage of domain-specific tokenization.””” # Generic tokenizer generic = AutoTokenizer.from_pretrained(‘bert-base-uncased’)
# Medical terms that generic tokenizers fragment
medical_terms = [
    "pneumonoultramicroscopicsilicovolcanoconiosis",
    "electroencephalography",
    "thrombocytopenia",
    "gastroesophageal"
]

logger.info("\n=== Generic vs Domain Tokenization ===")

for term in medical_terms:
    generic_tokens = generic.tokenize(term)

    logger.info(f"\n'{term}':")
    logger.info(f"  Generic: {generic_tokens} ({len(generic_tokens)} tokens)")
    # Custom tokenizer would show fewer tokens

    # Calculate efficiency loss
    if len(generic_tokens) > 3:
        logger.warning(f"  ⚠️ Excessive fragmentation: {len(generic_tokens)} pieces")
def medcpt_encoder_example(): “““Demonstrates MedCPT encoder for biomedical text embeddings.””” logger.info("\n=== MedCPT Biomedical Text Encoder Example ===")
try:
    # Load MedCPT Article Encoder
    logger.info("Loading MedCPT Article Encoder...")
    model = AutoModel.from_pretrained("ncbi/MedCPT-Article-Encoder")
    tokenizer = AutoTokenizer.from_pretrained("ncbi/MedCPT-Article-Encoder")

    # Example medical articles
    articles = [
        [
            "Diagnosis and Management of Central Diabetes Insipidus in Adults",
            "Central diabetes insipidus (CDI) is a clinical syndrome which results from loss or impaired function of vasopressinergic neurons in the hypothalamus/posterior pituitary, resulting in impaired synthesis and/or secretion of arginine vasopressin (AVP).",
        ],
        [
            "Adipsic diabetes insipidus",
            "Adipsic diabetes insipidus (ADI) is a rare but devastating disorder of water balance with significant associated morbidity and mortality. Most patients develop the disease as a result of hypothalamic destruction from a variety of underlying etiologies.",
        ],
        [
            "Nephrogenic diabetes insipidus: a comprehensive overview",
            "Nephrogenic diabetes insipidus (NDI) is characterized by the inability to concentrate urine that results in polyuria and polydipsia, despite having normal or elevated plasma concentrations of arginine vasopressin (AVP).",
        ],
    ]

    # Format articles for the model
    formatted_articles = [f"{title}. {abstract}" for title, abstract in articles]

    with torch.no_grad():
        # Tokenize the articles
        encoded = tokenizer(
            formatted_articles,
            truncation=True,
            padding=True,
            return_tensors='pt',
            max_length=512,
        )

        # Encode the articles
        embeds = model(**encoded).last_hidden_state[:, 0, :]

        logger.info(f"\nEmbedding shape: {embeds.shape}")
        logger.info(f"Embedding dimension: {embeds.shape[1]}")

        # Show tokenization comparison for medical terms
        logger.info("\n=== MedCPT Tokenization of Medical Terms ===")

        medical_terms = [
            "diabetes insipidus",
            "vasopressinergic neurons",
            "hypothalamic destruction",
            "polyuria and polydipsia"
        ]

        for term in medical_terms:
            tokens = tokenizer.tokenize(term)
            logger.info(f"\n'{term}':")
            logger.info(f"  Tokens: {tokens} ({len(tokens)} tokens)")

        # Compare with generic BERT tokenizer
        generic = AutoTokenizer.from_pretrained('bert-base-uncased')
        logger.info("\n=== Comparison with Generic BERT ===")

        for term in medical_terms:
            medcpt_tokens = tokenizer.tokenize(term)
            generic_tokens = generic.tokenize(term)

            logger.info(f"\n'{term}':")
            logger.info(f"  MedCPT: {len(medcpt_tokens)} tokens")
            logger.info(f"  Generic BERT: {len(generic_tokens)} tokens")

            if len(generic_tokens) > len(medcpt_tokens):
                logger.info(f"  ✅ MedCPT is {len(generic_tokens) - len(medcpt_tokens)} tokens more efficient")

except Exception as e:
    logger.error(f"Error loading MedCPT model: {e}")
    logger.info("Install with: pip install transformers torch")
    logger.info("Note: MedCPT model requires downloading ~440MB")
def main(): “““Run medical tokenization examples.””” logger.info("🏥 Medical Tokenization Examples") logger.info("=" * 50)
# Run generic vs domain comparison
compare_medical_tokenization()

# Run MedCPT encoder example
medcpt_encoder_example()

logger.info("\n✅ Medical tokenization examples completed!")
if name == “main”: main()
This example is a demonstration of how specialized medical tokenization works compared to generic tokenization. Let’s break it down:
The example has three main parts:
-**Generic vs. Domain Tokenization Comparison**: Shows how a standard tokenizer breaks down complex medical terms into many small pieces (tokens)
-**MedCPT Encoder Example**: Demonstrates a specialized medical text encoder model that better understands medical terminology
-**Comparison Between Tokenizers**: Directly compares how many tokens are needed for the same medical phrases using both tokenizers
The results clearly show that generic tokenizers struggle with medical terminology. For example, they split “hypothalamic destruction” into 6 tokens, while the medical tokenizer only needs 2 tokens. This is important because:
- Fewer tokens means more efficient processing (saves time and computing resources).
- Better tokenization leads to better understanding of the text’s meaning.
- Specialized models can handle longer medical texts within token limits.
The example loads two different tokenizers:
- A general-purpose one called “bert-base-uncased” that works for everyday language.
- A specialized medical one called “MedCPT-Article-Encoder” trained specifically on medical texts.
It then feeds several complex medical terms through both tokenizers and counts the number of pieces each term is broken into.
The results confirm what the article discusses: domain-specific tokenization is significantly more efficient for specialized text, reducing token counts by up to 66% in some cases, which directly impacts model performance and cost.
There are a couple of notebooks that you can walkthrough most of the examples in this article. Just download the source code from the repo as stated above, then run `task notebook` , navigate the `notebooks` folder and load the notebooks out and run through the examples.


# **About the Author**Rick Hightower brings extensive enterprise experience as a former executive and distinguished engineer at a Fortune 100 company, where he specialized in Machine Learning and AI solutions to deliver intelligent customer experiences. His expertise spans both theoretical foundations and practical applications of AI technologies.
As a TensorFlow-certified professional and graduate of Stanford University’s comprehensive Machine Learning Specialization, Rick combines academic rigor with real-world implementation experience. His training includes mastery of supervised learning techniques, neural networks, and advanced AI concepts, which he has successfully applied to enterprise-scale solutions.
With a deep understanding of both business and technical aspects of AI implementation, Rick bridges the gap between theoretical machine learning concepts and practical business applications, helping organizations leverage AI to create tangible value.
Follow Rick on [LinkedIn](https://www.linkedin.com/in/rickhightower/) or [Medium](https://medium.com/@richardhightower) for more enterprise AI and AI insights.
Apache Spark Training
Kafka Tutorial
Akka Consulting
Cassandra Training
AWS Cassandra Database Support
Kafka Support Pricing
Cassandra Database Support Pricing
Non-stop Cassandra
Watchdog
Advantages of using Cloudurable™
Cassandra Consulting
Cloudurable™| Guide to AWS Cassandra Deploy
Cloudurable™| AWS Cassandra Guidelines and Notes
Free guide to deploying Cassandra on AWS
Kafka Training
Kafka Consulting
DynamoDB Training
DynamoDB Consulting
Kinesis Training
Kinesis Consulting
Kafka Tutorial PDF
Kubernetes Security Training
Redis Consulting
Redis Training
ElasticSearch / ELK Consulting
ElasticSearch Training
InfluxDB/TICK Training TICK Consulting